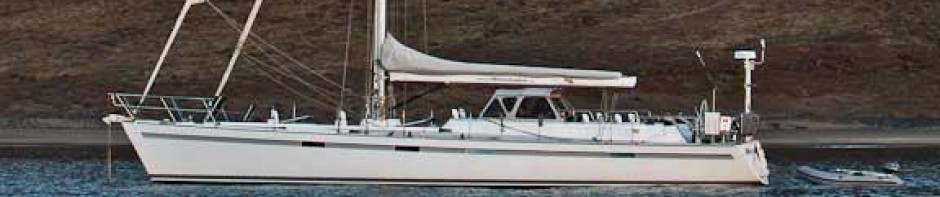
Over the years, we’ve found that with sails, just like the mechanical systems on the boat, regular care and maintenance will extend the useful life as well as improve their overall performance. All of our working sails are Dacron. I’ve still not been able to justify the additional cost and shorter useful life of the “high performance” fibers in the context of a yacht that is primarily used for cruising.
Aside from user error, the biggest enemy to a sail in the sun, so limiting exposure to UV can greatly extend its life. We try to get the cover over the main as soon as we’re done sailing for the day, unless we plan to head out again the next morning. Our furling sails have good acrylic UV covers on the exposed leech and foot edges to protect the sails when they are furled. For the sails in bags in the forepeak, we try to make sure they stay dry, so after a long and wet passage, we’ll bring them all out on deck so they can air out.
At least once a year, usually in the off-season, we take all the sails to a local loft, lay them out on the floor, and have a sail maker give them a thorough inspection. It’s a lot easier to take care of a bit of chafe, repair some UV damage or stitch up a seam that’s coming apart when the problem is small, rather than waiting till you’re in a blow in the middle of the ocean than to have one of those “oh shit!” moments that all sailors hate.
This has worked pretty well for us, as our main, which is nine years old and has done more than 50,000 miles is still about a six or seven on a scale of ten. We’ve got a genoa and an old heavy air spinnaker that don’t get used a lot, but are original equipment, nearly 20 years old, and still very serviceable. A few years back when I lofted the big genoa, we noticed that it had taken on a human tendency; it had stretched out and become very full in the middle as a result of age and abuse. I had it split from the head to the middle of the foot, the extra material removed, and the seam sewed up. This “tummy tuck” flattened the sail back to near its original shape and greatly improved its performance and useful life.
In reality, with the amount of sailing we do, it’s nearly impossible to avoid the occasional “field repair” so we keep a small tool bag on board with gear specifically for sail repairs. In it we keep an assortment of needles, various threads and twines, sail maker’s palms (both left and right hand, and a small adjustable one for Merima), etc. In addition, we keep a good supply of “sticky-back”, which is handy for making quick minor repairs or covering up chafe on the Dacron sails, and rolls of spinnaker tape, in the appropriate colors of course, for patching up the small holes or tears that seem to mysteriously appear in the spinnakers.
Over the years, I’ve done more amateur sail repair work than I can remember or care to mention, but the one that does come to mind was during the 1996 Pacific Cup race from San Francisco to Hawaii. Most of the race is a downhill spinnaker run, and we only had two symmetrical kites to work with, so it was essential to keep them both in good nik. We had put a few small holes in our light air kite on one of the middle of the night gybes. Rather than risk a bigger problem, my good mate Mark and I decided to take it down and make a field repair. The kite had ATN snuffer on it, so to get at the holes, we had to fully extend the sock and then slide it up to the head of the sail. Not easy to do on a boat moving downwind in a seaway in 25+ knots of breeze at 13 knots. We tied the head to the forward head faucet, ran the sail through the forward stateroom, salon, up the companionway, through both cockpits and tied the clews to the stern rail. We managed to get to the areas needing repair in the salon and forward cockpit, under the protection of the dodger. After rifling through hundreds of square feet of red and white .75 oz nylon for a couple of hours, locating a dozen holes and skillfully applying spinnaker tape patches (in the appropriate colors, of course) to both sides, we snuffed the sail again, horizontally, so it was ready to hoist it again. The repairs we made did the job and we were able to fly the kite for four more days and a thousand more miles on to Kaneohe Bay, Hawaii.